CheckMate Artist Inspection Tools | Maya Pack & Publish Tool
[/vc_column][/vc_row][vc_row padding_top=”0px” padding_bottom=”0px”][vc_column fade_animation_offset=”45px” width=”1/1″]CheckMate Artist Inspection Tools
[/vc_column][/vc_row][vc_row padding_top=”0px” padding_bottom=”0px”][vc_column fade_animation_offset=”45px” width=”2/3″]This download contains the latest installer for all of our Maya tools and technologies for CheckMate.
[/vc_column][vc_column fade_animation_offset=”45px” width=”1/3″]*Last Updated: October 12, 2011
[/vc_column][/vc_row][vc_row padding_top=”0px” padding_bottom=”0px”][vc_column fade_animation_offset=”45px” width=”1/1″]Included Tools
CheckMate Artist Inspection Tools (v0.81)
[/vc_column][/vc_row][vc_row padding_top=”0px” padding_bottom=”0px”][vc_column fade_animation_offset=”45px” width=”2/3″]The CheckMate Artist Inspection Tools allow you to pre-flight your model directly inside of Maya so you can check for technical defects that would prevent your work from being accepted as part of our CheckMate catalog. Instead of having to manually review your work when you’ve completed your model, you can run these tools to check dozens of aspects of your effort, from review for overlapping faces and nGons, to stripped texture paths and object naming. With the click of a button, you’ll be able to identify any corrections needed to hit the technical aspect of the CheckMate process, whether you are looking to provide a model that is CheckMate Lite, CheckMate Pro or PixelSquid quality.
Finally, it’s worth noting that these are the same tools that the TurboSquid inspection team uses when we review a CheckMate submission. By running these tools beforehand, your inspection will take less time and you can continue to build more great model content instead of trying to fix a broken product.
[/vc_column][vc_column fade_animation_offset=”45px” width=”1/3″]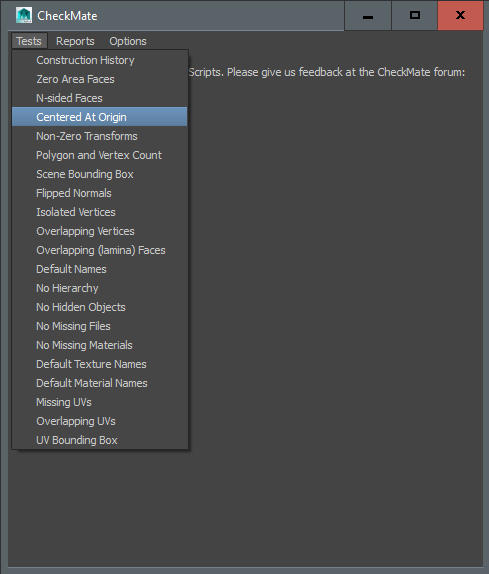 [/vc_column][/vc_row][vc_row padding_top=”0px” padding_bottom=”0px”][vc_column fade_animation_offset=”45px” width=”1/1″]
- Initial Release
NOTE: These tools only run under Windows. There is no Macintosh compatible version.
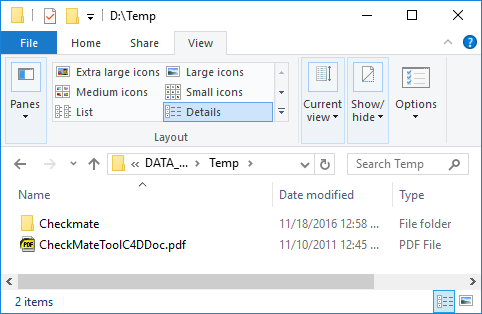
This ZIP file contains several files including a Maya scene called install.ma and several Python scripts. It also includes the documentation, CheckMateToolMayaDoc.pdf.
Now that you have the contents available, launch your copy of Maya. Choose File > Open Scene and navigate to the folder where the tools were extracted and open the file install.ma from the CheckMate‐0.8.1 folder. You MUST load the file this way and not through drag and drop.
IMPORTANT: You cannot drag the install.ma file into Maya to open it, nor should you open theinstall.ma file directly from Windows Explorer as this will cause the script to run with errors.
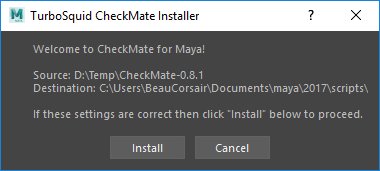
After you click Install, a CheckMate button is added to the Custom Shelf in the Maya interface. You will use this button to launch the CheckMate for Maya interface.

Uninstalling CheckMate Tools
Uninstalling the CheckMate tools in Maya consists of a two‐part process: deleting the Python files and removing the button from the Custom Shelf.
Removing the Custom Shelf button
- From the Window menu, choose Settings/Preferences > Shelf Editor to open the Shelf Editor. You can also click the arrow to the left of the main shelves and Shelf Editor.
- In the Shelf Editor, select the CheckMate item and click the trash can icon to delete it.
- Click Save All Shelves at the bottom of the Shelf Editor.
Note that if CheckMate is the last button on the shelf, you will not be able to delete the button as Maya does not allow empty shelves. You will instead have to delete the entire shelf.
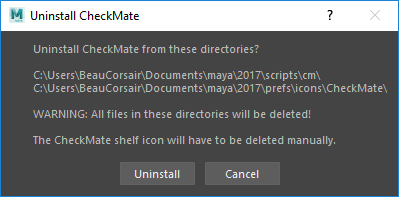
If you need to uninstall from outside the Maya interface, just delete these folders:
- C:\Users\username\Documents\maya\2011‐x64\scripts\cm and
- C:\Users\username\Documents\maya\2011‐x64\prefs\icons\CheckMate.
CheckMate Tool User Reference
User Interface
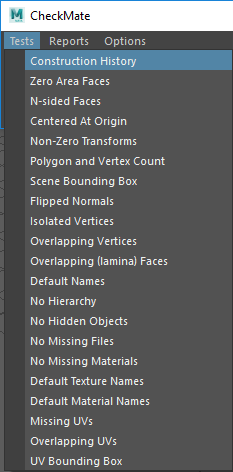
Tests Menu
This menu enables you to run each of the CheckMate tests individually. The results of these tests can be viewed either on the output line at the bottom right of the Maya main window, or in the Script Editor. Unless otherwise specified.
NOTE: On individual tests, a result of False denotes a PASS. A result of True signifies a FAIL. This may seem counter‐intuitive, but the test is essentially reporting false if it can’t find any problems with a certain test, while it reports true when it does find something wrong.
- Construction History ‐ Checks if any objects have construction history
- Zero Area Faces ‐ Checks if any faces exist with a surface area of zero
- N‐sided Faces ‐ Checks if there are any N‐gons in the scene
- Centered at Origin ‐ Checks if objects at the top of the hierarchy are centered at the origin. Note that this test is overly precise. It almost always fails unnecessarily. You should check for centering at origin visually in the Maya viewport.
- Non‐Zero Transforms ‐ Checks if any objects have any transforms that are not zero
- Polygon and Vertex Count ‐ Prompts for a polygon and vertex count, then compares them to the number of polygons and vertices in the scene
- Scene Bounding Box ‐ Measures the scene in centimeters
- Flipped Normals ‐ Checks if any normals are flipped incorrectly. Note that this requires a human inspector to confirm that the reversed or flipped faces are really an issue.
- Isolated Vertices ‐ Checks if any vertices exist that are not connected to any lines or polygons
- Overlapping Vertices ‐ Checks if any vertices on the same object occupy the same space
- Overlapping (Lamina) Faces ‐ Checks if any faces occupy the same space
- Default Names ‐ Checks if any objects have default names
- No Hierarchy ‐ Checks if there is more than one top‐level transform
- No Hidden Objects ‐ Finds and unhide all hidden objects
- No Missing Files ‐ Checks if any files are referenced improperly
- No Missing Materials ‐ Checks if any materials are referenced improperly
- Missing UVs ‐ Checks if any faces are missing UV mappings
- Overlapping UVs ‐ Checks if any UV faces are overlapping each other
- UV Bounding Box ‐ Checks if all UVs are within the 0:1 bounding box
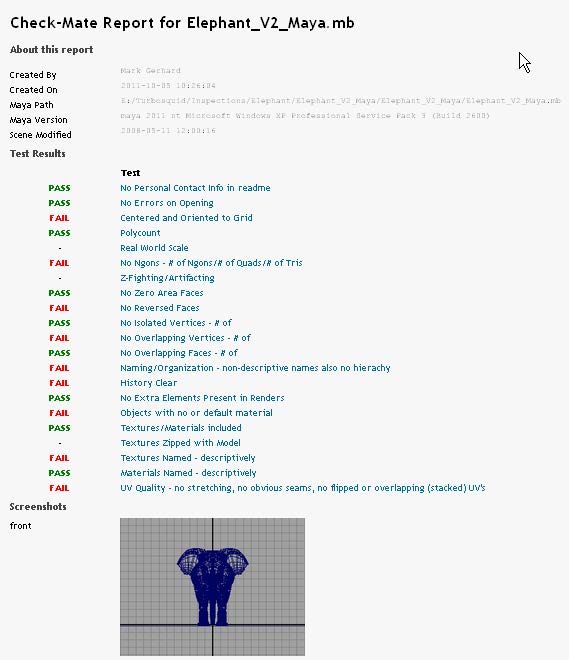
For more information on these tests, see the descriptions on the HTML output from a full CheckMate report.
Reports Menu
- Save HTML report on current scene ‐ This option outputs to an HTML file in a new directory with the same name as your scene file and in the same location, along with some test wireframes. The results of the test will be opened automatically in your web browser once the test is complete. NOTE: On large scenes, running a full test can take a very long time and cause Maya to become unresponsive.
- Open scene and save HTML report ‐ Allows you to choose a scene file and then automatically runs a full test and saves a report on it. WARNING: This will close the current scene without saving. Save your work before using this feature!
- Open folder and save HTML reports ‐ Allows you to choose a folder and automatically runs a full test on each Maya scene file within that folder. This option is affected by the “Include Subdirectories” option (see below). WARNING: This will close the current scene without saving. Save your work before using this feature!
- Include Subdirectories ‐ When using the “Open folder and save HTML reports” feature, this option controls whether or not the folder search is done recursively. If enabled, the script will run tests on all Maya scene files in the folder and also with all sub‐folders.
Options Menu
- Verbose ‐ Enables some additional debugging output. This information can be viewed on the Script Editor within Maya while the test is running. NOTE: This can create additional overhead during the test and cause it to take significantly longer.
- Uninstall CheckMate ‐ Removes TurboSquid CheckMate for Maya from your Maya installation. NOTE: The shelf button will have to be removed manually. See Uninstalling CheckMate Tools in this document.
Advanced Usage
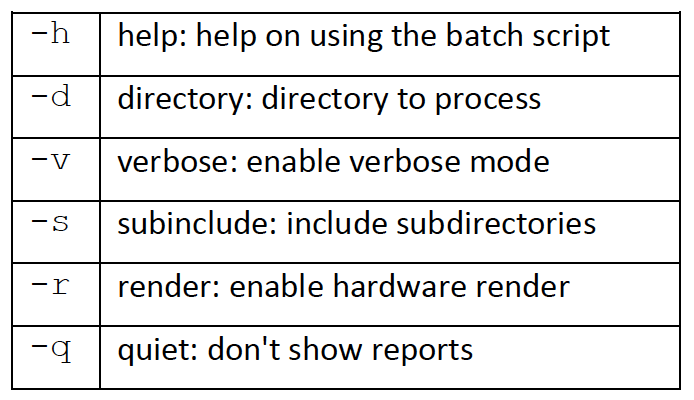
TurboSquid CheckMate for Maya can also be operated from the command line in batch mode. This command can be accessed by running the Maya Python interpreter on the module cm.batch, like so:
$ mayapy -m cm.batch <scene files>
Note that you must either navigate to your maya bin folder or have your PATH set up to include it in order to invoke Maya’s Python interpreter in this way.
Tips from CheckMate Inspectors
Erroneous Reversed Faces Report
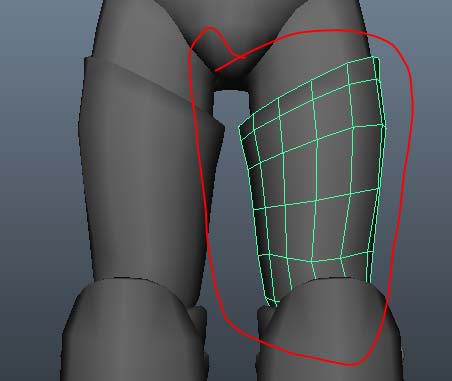
At times the script report will say that the model has reversed faces when there actually are none. If the object is isolated the reversed faces are not closed in by the geometry of the object, causing this incorrect report. In the image on the left below, the selected object was flagged by the script for having reversed faces.
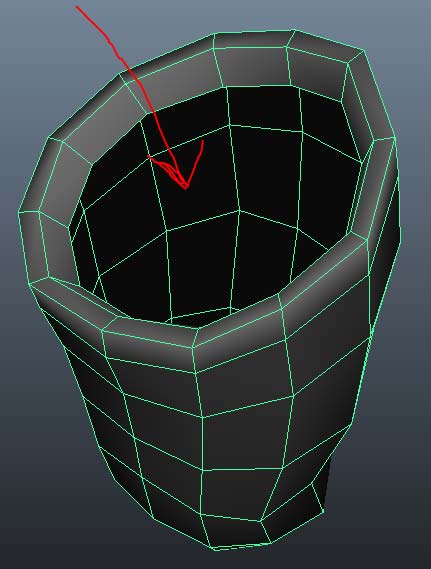
If you isolate the object, you can see that all of the faces are oriented correctly but the back faces are exposed, as shown on the right. This is what triggers the script to flag the object.
Object Names
Broken Rigs
Running the script usually breaks any rigs that are applied to the scene. Every rigged model that we have run the script on has not worked after running the script. This may have something to do with the script adjusting the history and/or breaking the skin binds. This can be fixed by hitting undo after running the script. However, the safest way to deal with rigged models is to run the script and then reopen the model newly after the script generates the report just to be sure that the working rig does not get saved over.
If you run into issues or have questions about the Maya CheckMate Inspection Tools or the results you get from running them on your models, please contact our support group to get answers.
Maya Pack & Publish Tool
[/vc_column][/vc_row][vc_row padding_top=”0px” padding_bottom=”0px”][vc_column fade_animation_offset=”45px” width=”2/3″]This download contains the latest installer for all of our Maya Pack & Publish tools.
[/vc_column][vc_column fade_animation_offset=”45px” width=”1/3″]*Last Updated: December 5, 2015
[/vc_column][/vc_row][vc_row padding_top=”0px” padding_bottom=”0px”][vc_column fade_animation_offset=”45px” width=”1/1″]Included Tools
Maya Pack & Publish Tool (v1.0)
[/vc_column][/vc_row][vc_row padding_top=”0px” padding_bottom=”0px”][vc_column fade_animation_offset=”45px” width=”2/3″]The Maya Pack and Publish tools are designed to allow artists to easily pack up all assets associated with a model and to publish them for sale on TurboSquid. The tools include inspection pre-flight tests to help ensure that their models meet the CheckMate standard, scene aggregation technology, image generation tools to help create images that match the current TurboSquid image requirements, and other useful features.
The reason we designed these tools is to help you manage the publishing preparation process, which can be a source of frustration for you and tends to slow down your ability to create additional models you can sell and make money on. We’d rather you spend your time building new models and less time focusing on how to get your models to TurboSquid in a “ready-to-sell” manner.
[/vc_column][vc_column fade_animation_offset=”45px” width=”1/3″]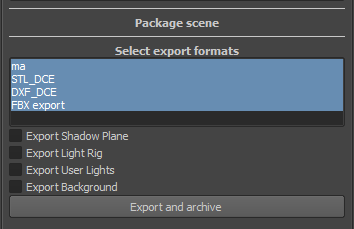 [/vc_column][/vc_row][vc_row padding_top=”0px” padding_bottom=”0px”][vc_column fade_animation_offset=”45px” width=”1/1″]
- Initial release
- Maya Version Compatibility: Maya 2014 – 2016
- Renderer Compatibility: mental ray and V-Ray
Known Limitations
- If your scene contains animation or rigging data, the current version of the Maya Pack and Publish tool will not work for you as it will remove the animation data upon initialization.
- Files that utilize the Maya Software renderer are not supported
Workflow
The intended workflow for the Maya Pack and Publish tools is for you as an artist to spend your time building your model and not to worry about the publishing process until you’ve finished with the modeling and texturing process. You shouldn’t need to worry about lighting, backgrounds, rendered image sizes or anything else, and the Pack and Publish tools can assist you with this at the end of the process.
Process Overview
- Build and texture your model
- When you finish your model, launch the Pack and Publish Tools.
- Run the CheckMate inspection tools to pre-flight your model and make sure it meets the CheckMate standards (these are the same tools we run internally at TurboSquid)
- Run the remaining Pack and Publish features to prep your scene, collect all textures and metadata, generate all imagery and turntables, then save this new file
- Save your new CheckMate publish scene file to preserve all of the cameras and publishing data
- Upload everything to TurboSquid for publishing and CheckMate submission
Launching the Tools
Scene Preparation
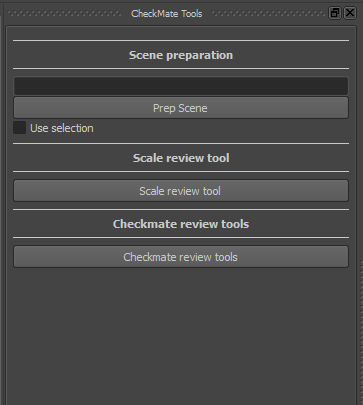
When you first run the Pack and Publish Tools, you’ll be presented with a single docked dialog as shown.
You immediately have three choices: you can prepare your scene for publishing, you can run the CheckMate review tools (these are the same tools our inspection team uses to validate submitted models for CheckMate certification), and you can visually check the real-world scale of your model against several known object types.
The first thing many users do is let the tools prep their scenes.
- In the textbox, type in a name for your scene. This name doesn’t need to include any special prefix information or match the original name of your model inside of Maya. The Pack and Publish tools will use this name to create a new sub-folder for you as well as other things as described below.
- When done, click the Prep Scene button. That will launch a standard Maya directory selector window which will let you choose a top-level folder where you want to save your publisher scene.
- Once you’ve chosen a folder to save your file into, click on Save in the dialog.
Upon clicking the Save button, a number of things will happen behind the scenes.
- First, the tool will notify you if any animation you’ve applied to the model will need to be erased. Currently, the Maya Pack and Publish tools only support static models, not animated ones. This is something we will try to support in the future.
- A new sub-folder is created within the location you identified. So, if you create a model of a chair, and type in MyChair into the Scene Preparation textbox, upon finishing of the prep, you’ll have a \TSPublishing\CM_MyChair sub-folder with all of the components required to publish within it as described below.
- The active Maya project directory is changed over to this newly created location so all of the subsequent files you create are placed properly in this publishing folder.
- A copy of your original file, regardless of its location, is moved to this new folder and renamed with a CM_ prefix. So if you’d entered MyChair in the Scene Preparation dialog, a copy of the file named CM_MyChair.ma (or .mb if you’re using binaries) is placed in the sub-folder created in the prior step regardless of what you named it originally.
- A second copy of your original file is created in your new folder and renamed with an Original_ prefix. So if you’d entered MyChair in the Scene Preparation dialog, a copy of the file named Original_MyChair.ma (or .mb if you’re using binaries) is placed in the sub-folder created in the prior step.
- Additionally, copies of all of the textures that are a part of your scene file are also placed into this new publishing folder. The pathing for these textures is also changed within the copy of your original Maya file to be a flat file structure. Be aware that any unused materials in the HyperShade that use textures will also have those textures copied across, so be sure to clean up your materials prior to running your scene through the Pack and Publish tools.
- Your scene objects are placed into a group, and named after your Scene Prep name. So if you have a chair model with multiple pieces, all of those pieces are selected and grouped under a group called MyChair in the Outliner.
- Moreover, in your Display Layers, a new layer is generated and named after your Scene Prep name and your model is moved into it (to support the CheckMate requirement on putting your objects into their own layer).
- Any pre-existing lights in your scene are gathered and placed into a group calledUserLights in the Outliner.
- Any empty Display layers are removed from the CM_ scene file.
- Any empty groups are removed from the CM_ scene file.
- Finally, a large number of Render Passes are automatically created in the Render tab that are used later when rendering out the various types of imagery needed for CheckMate.
Use Selection Checkbox
Activating the Use selection feature is handy if you have created background elements that you don’t intend to sell with the model (such as a ground plane / floor / walls / bounce cards, etc.). Again, remember that any elements deleted from your scene are NOT removed from your original file, only from the publishing file that is created.
Scale Review Tool
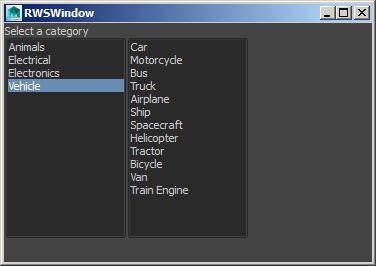
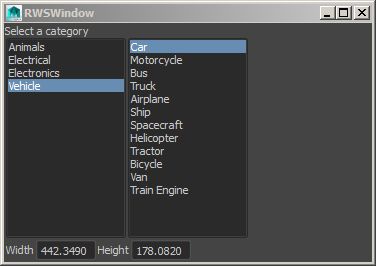
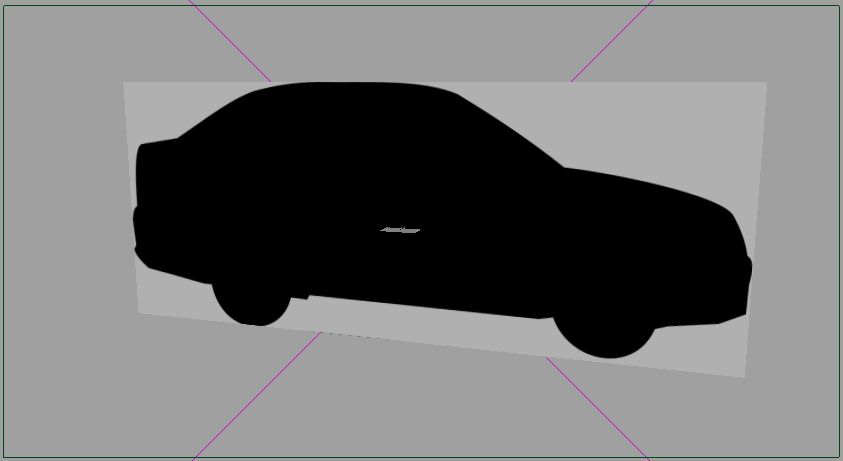
For instance, if you’ve built a car model, clicking onVehicle -> Car, the Pack and Publish tools will add a silhouette image plane into your scene to help you visually verify the relative scale of your model to a generic template of the same real-world item. The dialog will update to show you the approximate real-world dimensions of the object you’ve chosen.
NOTE: There are currently a limited number of items in the list at present, and we’ll be adding more categories and silhouettes later, so this feature may or may not help you right away depending on what you’re building.Also be aware that the Pack and Publish tools will add an RWSPlane object into your publishing scene file – and you should delete it when you save your new publishing file.
CheckMate Review Tools
Tools Menu: In here is a complete list of CheckMate tests that you can run individually on your scene file. All results are shown within the Script Editor dialog and will report any problems to you to fix.
Reports Menu: This menu contains controls to run all of the tests included in the Tools Menu at once instead of individually, and to save out an HTML file with the results.
Options Menu: Here you can turn on or off how detailed you want the HTML reports that describe the CheckMate inspection test results.
Product Description
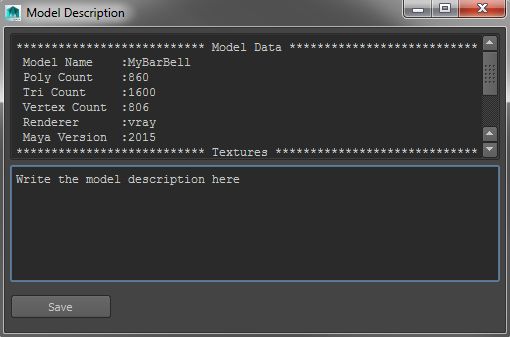
Write Description: Clicking on this button will launch a new Model Description dialog that will automatically capture important information regarding your model including:
- Model Name
- Poly / Tri / Vertex counts
- What renderer is used
- The version of Maya used
- The bitmap texture file names and aspect ratio sizes
- Units used
- Dimensions of your model
In the lower half of this dialog, you’ll see a space where you can write out a model description. Once complete, click on the Save button at the bottom of the panel, and the Pack and Publish Tools will save out a simple .TXT file with all of this information for you to use when you are ready to publish on TurboSquid. The text file is saved to the root folder of your Publishing Folder.
Package Scene
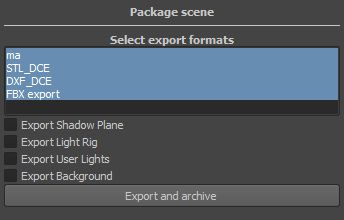
This section allows you to run several automated export functions of your scene to other open formats including STL, DXF and FBX. Simply highlight the file types you want to export and then click the Export and archivebutton. The archive portion of the process will compress the converted file and any bitmap textures into a .ZIP archive file.
Export Shadow Plane: Enabling this checkbox will include the procedurally generated CheckMate groundplane with your scene file elements.
Export Light Rig: Enabling this checkbox will include the procedurally generated CheckMate lighting rig (created within the Render setup tab) with your scene file elements.
Export User Lights: If your original scene file contained any lights, these were grouped into a node called UserLights. With this checkbox enabled, your original lights will be exported with your scene elements.
Export Background: If your original scene file contained background elements that are not part of the file for sale, these were grouped into a node called CMBackground. With this checkbox enabled, your original background elements will be exported with the scene elements.
About: Pressing this button will show you the current version of the Maya Pack and Publish Tools. If you ever have a problem with the tools, it’s always a good idea to report the version of the tools along with which version of Maya you’re running and what operating system you’re running under.
SnapShots Tab
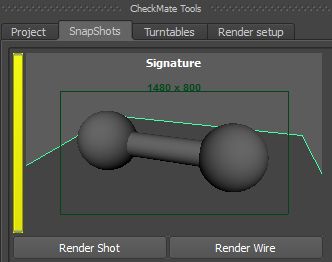
By default, the first shot you take is considered the Signature image, and is identified by the yellow bar to the left of the shot.
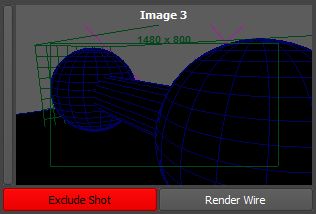
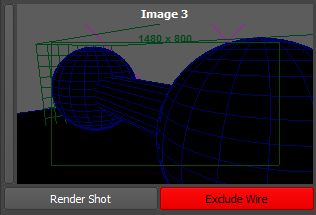
The two buttons that appear beneath each snapshot thumbnail informs the batch render whether or not to render the image as both a photoreal render and wireframe, just as a photoreal render or just a wireframe image. Think of these two buttons astoggles for rendering.
By default, each snapshot is included in both the Product Shot rendering pass, as well as the wireframe rendering pass. But you can control that simply by clicking on these buttons.
This is a simple visual display to let you know how many shots you have in total, and how many are required for CheckMate. The value of 6 represents your Signature image, and 5 Product Shots. The Signature image is used to generate the Square Signature and Context Signature at render time, so you don’t have to worry about setting these up individually.
Editing Images
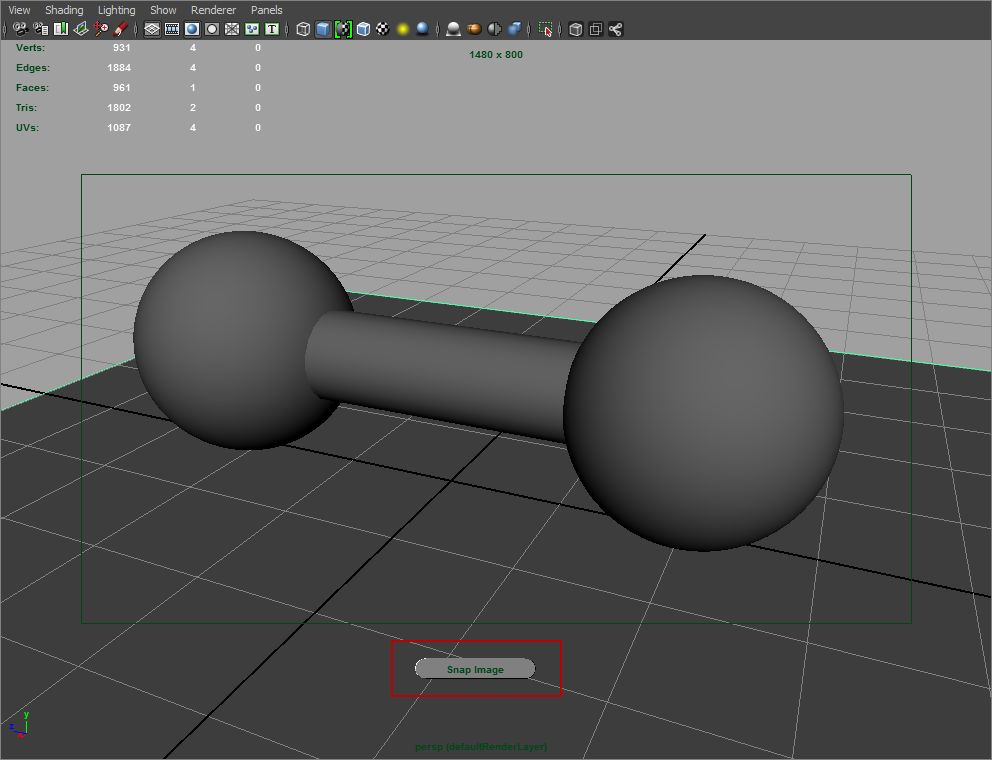
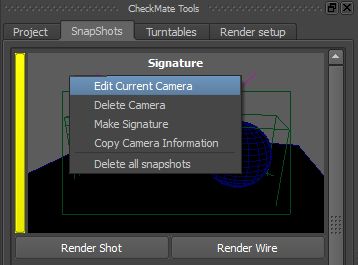
Edit Current Camera: Clicking on this option will load up the currently selected snapshot view and the button in the Maya viewport UI will change from Snap Image toUpdate Image.
You are free to reframe the shot to your liking, then press the Update Image button to save your changes which will be reflected in the thumbnails.
Delete Camera: Clicking this option will delete the current SnapShot and associated camera from the list. Be aware that doing this can put you back under the required number of images for CheckMate, so be sure to look at the bottom of the panel to see how many you have remaining after this operation completes.
Make Signature: Selecting this option on any other image in the list that is not already the Signature image will cause the selected image to inherit the Signature yellow bar and to be utilized when rendered as the Signature image for your product.
Copy Camera Information: In some cases, you’ll take shots of parts of your model that you like, and you may later desire to create another similar shot during your setup. Instead of trying to reframe your Maya view to match, you can click this option, which will create a new camera view that matches your chosen view, allowing you to update it quickly to another new view.
Delete all snapshots: Clicking on this option completely resets the SnapShots panel and removes all cameras, shots and information. You will be starting from scratch after performing this action, and as such, we prompt you prior to the deletion process.
Turntables Tab
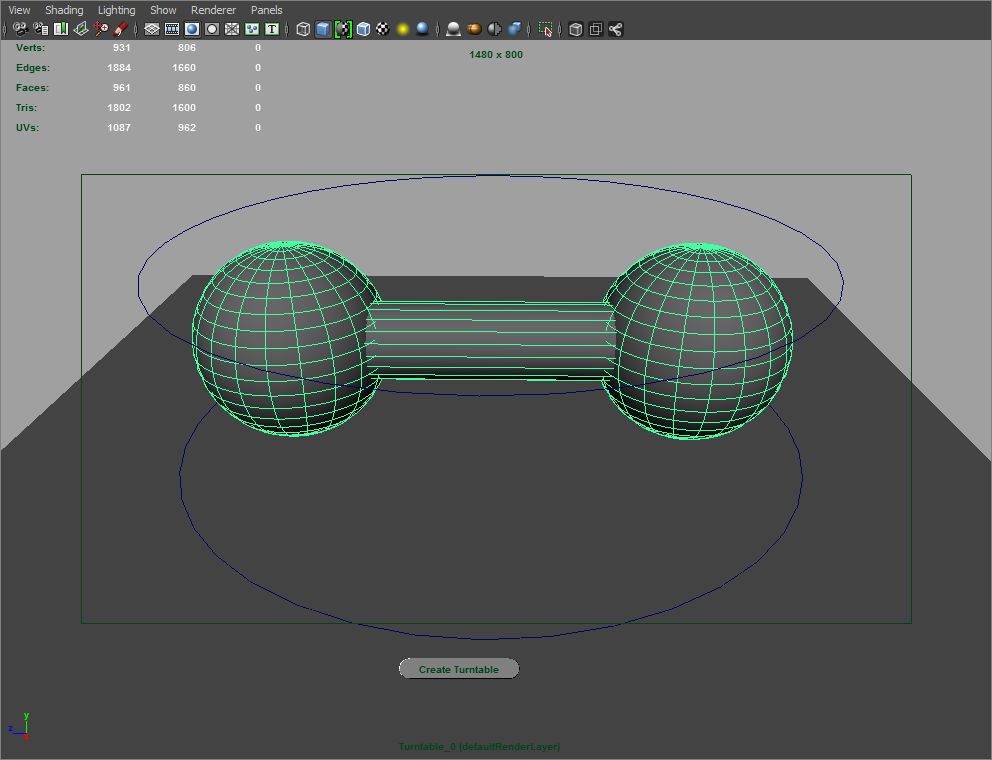
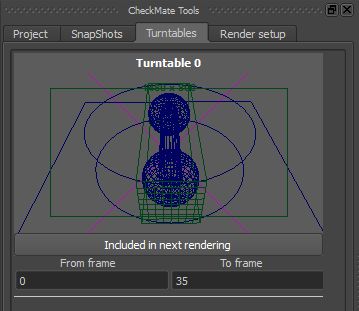
This section of the Maya Pack and Publish tools is where you generate one or more turntables to be rendered. When you enter this tab, you’ll automatically see that aCreate Turntable button has appeared in your Maya viewport beneath the Resolution Gate.
Moreover, you should see to circular splines aligned with the top and bottom of your geometry, giving you a helpful visual rotational bounding volume that your object should stay within when rotating.
In order to see the turntable motion, simply scrub the time slider in Maya. You should see that the active sequence is already set up for 36 frames, rotates counter-clockwise automatically and loops as expected. If you don’t like the framing (if some part of your model clips the frame during rotation), you can adjust your composition until you find what you like, then simply click on the Create Turntable button.
The turntable thumbnail will be added to the Pack and Publish UI, and you can continue to add as many turntables as you like.
Included in next rendering: This toggles the inclusion of the turntable in the next batch render process. When toggled, it will turn red and read Excluded from rendering.
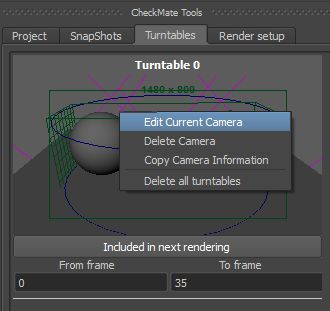
Editing Images
Edit Current Camera: Clicking on this option will load up the currently selected turntable view and the button in the Maya viewport UI will change from Create Turntable to Update Image.
You are free to reframe the turntable to your liking, then press the Update Image button to save your changes which will be reflected in the thumbnails.
Delete Camera: Clicking this option will delete the current Turntable and associated turntable camera from the list. Be aware that doing this can put you back under the required number of turntables for CheckMate, so be sure to look at the bottom of the panel to see how many you have remaining after this operation completes.
Copy Camera Information: In some cases, you’ll create a turntable of your model that you like, and you may later desire to create another similar turntable during your setup. Instead of trying to reframe your Maya view to match the original turntable, you can click this option, which will create a new camera view that matches your chosen view, allowing you to update it quickly to another new view.
Delete all turntables: Clicking on this option completely resets the Turntables panel and removes all cameras and information. You will be starting from scratch after performing this action, and as such, we prompt you prior to the deletion process.
Render Setup Tab
This section of the Maya Pack and Publish tools is where you set up lighting and quality settings for rendering out all of your imagery.
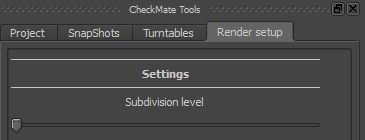
Subdivision level: This slider controls the amount of subdivision smoothing that is applied to your scene geometry at render time. By default, the slider is set to the furthest left position which does not add any extra subdivision to your model. The middle position will add one level of subdivision, and the far right position will add two levels of subdivision to your scene geometry.
Lighting presets: Providing with the P&P tools are a few preset light rigs that will help your model look the best it can. Simply choose a light rig from the list and select “Create Light Rig”. Once created you can control the intensity of the light and HDRI to meet your needs.
Wireframe Settings: After selecting “Subdivision text placement” a window will appear providing a sample of how the wireframe images will appear. If subdivisions will be created you can also control where the text appears on the image. To alter the position of the text right click the text within the new window and choose one of the 4 options. Color can also be adjusted so the text is visible against any background.
Rendering UVs: When this option is select an image of the model with a UV colorful grid will be created when the model is batch rendered to showcase how the UV layout appears on the model.
Rendering
After preparing the preview images, turntable and render setup the model is ready for batch rendering. In order to batch render the preview images and turntable set the menu to Rendering and select “Render > Batch Render”.
Rendering will commence immediately and progress can be viewed by opening the script editor. Once rendering is complete the images will be placed within an Images folder where the scene was prepped.
If the batch render needs to be canceled before completion select “Render > Cancel Batch Render” and select yes.
